How to Remove Tile From a Concrete Floor
The first step in removing tile from concrete floor is determining how the tile is attached. If it’s a floating or click-in place tile, you can simply slide a pry bar beneath one edge and lift it gently. If not, your tile was probably glued down using thin-set or mastic adhesive.
Tools
A few key tools are needed to make the tile removal process go as smoothly as possible. A cold chisel and a pry bar are essential, as well as protective gear for your eyes, hands and ears. A bucket is also a handy tool for carrying around broken pieces of tile and depositing them into the garbage, keeping your work area clean as you go.
Start by finding a loose tile and prying it up from the floor. This is easier than removing a fully attached layer of tiling, as you don’t have to worry about damaging the concrete floor or sub-floor beneath.
Next, use a grout saw or multi-tool with a grout removal attachment to score the surface of the remaining tile and break it into manageable chunks. This step will also help to weaken the bond between the tile and the concrete and allow it to be removed more easily.
Preparation
As with any demolition work, it’s important to take time to prepare the work area. Clear the space of moveable items, such as wall hangings or furniture. Also, cover or seal any vents in the room to prevent dust from circulating throughout your home or workplace.
Then, determine how your tile is attached to the concrete floor. If it yields a sticky, gummy residue when scraped or pryed with a pry bar, it’s probably set with mastic adhesive. Otherwise, the tiles are likely set with thin-set mortar.
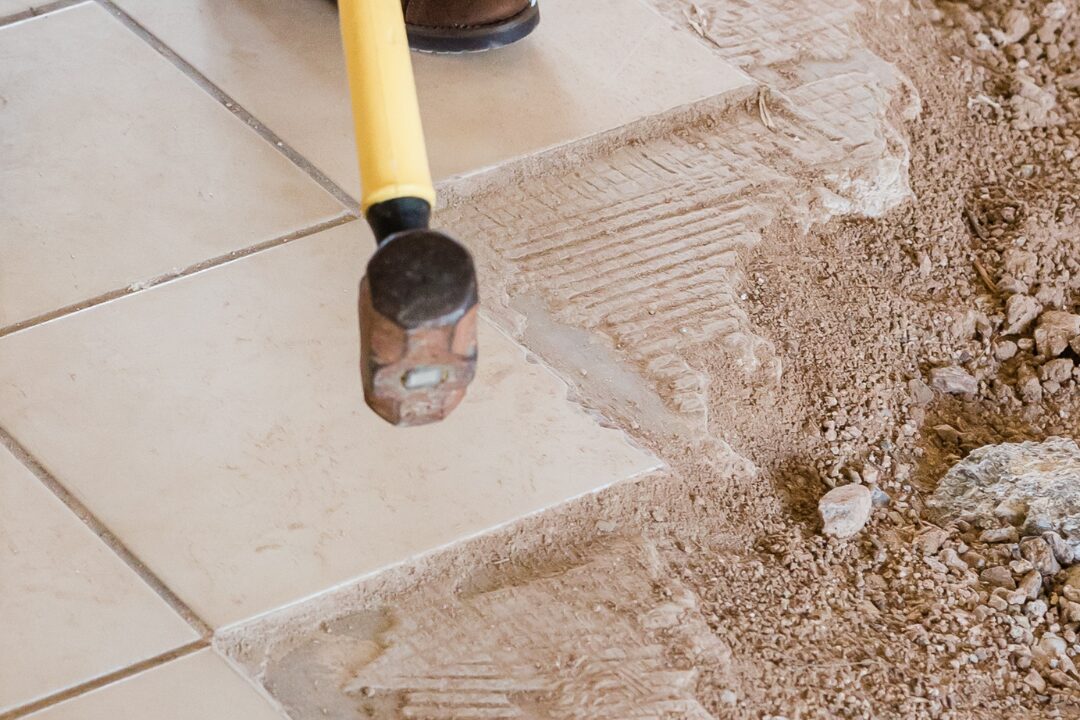
Find a starting point, such as an edge of loose tile or the corner of a removed piece. Position the tip of your chisel at an angle lesser than 45 degrees to avoid gouging the concrete floor beneath. Strike the chisel with your hammer to break it into pieces that can be pried up. Continue this process, depositing tile waste in a trash can or bucket to minimize clutter.
Removal
If you’re doing a renovation or replacing a tile floor, you need to know how to remove the old one without damaging the concrete subfloor underneath. This is a hard task and it takes time and effort. But it can be done if you follow the right steps and use the right tools.
Begin the removal process by breaking a few tiles at a time with your hammer to loosen them. This will make it easier to insert your pry bar under the remaining ones and pull them up. Repeat this process until the entire floor is free of tile.
The next step is to sweep and vacuum up the debris from the floor. This will help ensure that the concrete subfloor is smooth and ready for whatever flooring you plan to install. Always remember to wear a dust mask and safety glasses for your own protection against flying dust and sharp tile pieces. Knee pads are also a good idea since you will spend a lot of time kneeling on the ground.
Cleaning
Once you remove tile from a concrete floor, there may be shards of ceramic, pieces of thin set, mastic or backerboard, as well as a layer of dust that needs to be cleaned up. Use a vacuum or broom to sweep up the debris and dispose of it as needed.
If the cement floors are stained, try using a nylon brush and baking soda. If that doesn’t work, mix a solution of equal parts water and vinegar. If you want to try a more powerful cleaner, muriatic acid (aka hydrochloric acid) can be used. Always wear a hazmat-type coverall, goggles, gloves and a respirator when working with hydrochloric acid, and follow all safety instructions.
If you are working on an older flooring project, make sure to check for asbestos before removing any tile. Asbestos can be found in linoleum and vinyl floor tiles and in the adhesive that was used to install them. It’s important to have a professional perform an asbestos abatement when necessary.
Call Floor Busters today for all your tile removal needs!