Removing tile floor isn’t always easy, but it can be done safely. The key is knowing how to use your tools correctly.
It doesn’t take specialized skills or a lot of time to get the job done. But you do need to put in some hard work. With that, you’ll have a new floor to enjoy.
Prep the Area
To get the best results, you’ll need to make sure the area is prepped for the tile removal process. This will prevent any damage to other parts of the room and help you clean up quickly and easily.
Start by removing any baseboards and trim from around the room. You may also want to cover any vents in the space to prevent dust from escaping.
Seal any doorways you have to work in, as well. A roll of plastic is a great way to do this.
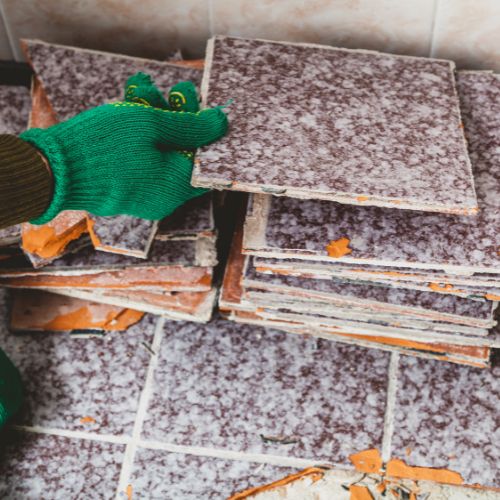
The tiles themselves can be quite brittle, so you’ll need to wear protective gear such as long-sleeved shirts and pants and gloves.
It’s also a good idea to use a hammer and chisel to break up the tile. This is the easiest part of the whole process and will help you move along quicker.
Remove the Underlayment
The underlayment is the layer that holds the floor together and is a necessary part of any flooring project. Whether you have tile on your floors or are removing it to put in a new style, you will need to remove the underlayment before replacing it.
Depending on how the tiles were attached, removing them may be simple or require a lot of force. You can use a hammer and chisel, a pry bar or a pole scraper to break up the tiles and get them off the floor.
However, if the tiles were attached with mastic or mortar, you’ll need to be more careful. This is because the adhesives and mortar can be hard to break.
The easiest way to remove the underlayment is to cut it into manageable sections using a circular saw, then unscrew or use a pry bar to pull up each section. This will also allow you to replace it with a new type of underlayment, such as cement board or plywood, if it is damaged.
Break Up the Tiles
Removing a tile floor can be a challenging job, especially if you don’t have the right tools. But if you take your time and make sure to prepare well, removing a tile floor is easier than you might think.
Start by breaking up any tiles that are coming loose, cracked or damaged. This is an ideal way to preserve the rest of your old tile and prevent damage when you remove it.
Use a chisel to work the broken tile into smaller pieces. Breaking up the tile will force it to come off easier.
Continue breaking up tiles until you’ve removed most of them. Once they’ve all come off, use a broom to sweep the loose tile and grout into your garbage bags.
This will make it easier to clean up the project site and minimize the amount of debris you have to haul to your outdoor trash can or rented dumpster. Chunks of tile can accumulate quickly, so it’s important to throw them away as you go.
Clean Up
Tile is a relatively low-maintenance floor, but dirt and grit can still accumulate. Fortunately, cleaning ceramic and porcelain tile is a simple process using just water and mild dish soap.
Before you begin, sweep or vacuum the floor thoroughly to get rid of any loose dirt and sand. This helps prevent future dirt from seeping in, affecting the look of your floors.
After the floor is clean, use a mop to wipe up any lingering debris. You’ll want to avoid a sponge mop, which can push dirt under the tiles and into the grout, and instead use a string or strip mop with a chamois head to wipe up grime.
After a good cleaning, you’ll have a floor that is shiny and splatter-free. Just be sure to dry it off well.